I mean, it's a miracle! I mopped!
I've never been big on mopping. I don't mind vacuuming, and I'll spot clean, Swiffer, etc - but dragging out that mop and bucket, with all that toting and pushing and pulling, and it seemed like I was just kind of moving dirty water around, because no matter what I used, or how many times I mopped, the bucket water never came up clean. I blamed all the foot traffic, the dogs, the old linoleum, and yes, my lay, slovenly housekeeping ways. Plus, I always ended up with a 2-day backache. So yeah, I didn't mop often around here.
But then....it was a slow day at work, and we were discussing mopping.
Like I said, a slow day.
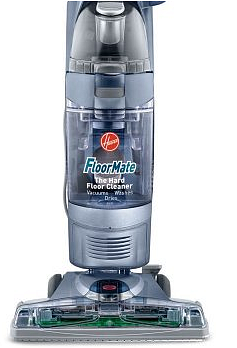
And my friend Ruth told me about this amazing creation: The Hoover FloorMate.
This thing is amazing. It vacuums, and it is the strongest, best vacuum for floors I have ever used. Unlike my otherwise beloved Oreck, this vacuum doesn't miss a thing - stray dog hair tumbleweeds no longer blow across the floor, caught on an updraft created from the vacuum itself. As far as I can tell, the FloorMate is 100% suction - no air blowing around. So all the crumbs, sand, beads (oops), dog hair, grass - all gets sucked up into the tank, which you just pull out and empty.
And it is lightweight. And easily maneuverable.
And the FloorMate mops. And by mops, I mean it scrubs. There is a cleanser tank that you fill with a mix of cleanser and hot water. You make regular vacuuming motions, press a button, and the cleanser comes out, and the brushes scrub, and it sucks up the dirty water, so it won't let you spread dirty water around the floor. No backbreaking bending, pushing, pulling; no heavy buckets of dirty water to lift. When the dirty water tank is full, just empty it, and keep going.
See how easy this paid Hoover model makes it look? That's not Photoshop! It really IS that easy.
I have a BIG kitchen, and I had let the floor get really dirty, what with my mopping aversion, so it took me 2 tank fills & empties to get the entire kitchen done, but it was so easy, and my floor is SO clean. And no sore back, no sore muscles - genius!
And it will even DRY the floor if you want - just switch the selector to DRY, and go back over where you just mopped. I tried it, but it seemed like a waste of time in the kitchen. However - when I tackle the hardwood floors next weekend, I will definitely use the "dry" function.
This is, as usual, a totally unpaid endorsement. But my FloorMate made what used to be a huge dreadful chore into a breeze. More time for beading!
Thanks, Hoover!
Back to beading now.
Monday, September 5, 2011
Saturday, September 3, 2011
Hi, Jean!
Just a silly little post this morning - I have hours of beadweaving ahead of me for my Bead Soup Blog Party project, with the beautiful beads sent to me by my partner, Tammy Jones of Jewelry Making Daily.
And speaking of Tammy, she made a wonderful post about the Bead Soup Blog Party (BSBP) yesterday. Although I am not sure how I got this reputation for being hilarious...?!?! LOL
But I peeked at my blog this morning, and the little rotating Facebook widget showed Jean Campbell's smiling face as someone who likes Sweet Freedom Designs, and that just kind of was like a sign from the universe, that yes, I should get off this computer and go bead weave. Stat!! 'Cause Jean is one of my beadweaving idols....and those beads over there on my desk aren't going to weave themselves!
Like I said, silly post... off to weave now.
And speaking of Tammy, she made a wonderful post about the Bead Soup Blog Party (BSBP) yesterday. Although I am not sure how I got this reputation for being hilarious...?!?! LOL
But I peeked at my blog this morning, and the little rotating Facebook widget showed Jean Campbell's smiling face as someone who likes Sweet Freedom Designs, and that just kind of was like a sign from the universe, that yes, I should get off this computer and go bead weave. Stat!! 'Cause Jean is one of my beadweaving idols....and those beads over there on my desk aren't going to weave themselves!
Like I said, silly post... off to weave now.
Thursday, September 1, 2011
I've been Resinating!
I have been playing around with Ice Resin, making some resin jewelry. It's fun, and fast (except for the 3-day cure time!) - and a neat way to use found objects, photos, and other trinkets.
These are a few pieces I have created:
This one has a bronze-colored simulated wood-grain bezel, and I filled it with gears, paper flowers, and Martha Stewart glitter!! Ooh-la-la! And then poured in the resin, and voila!
For this pendant I used the same bronzy wood-grained bezel, and added several gears, on top of some shiny copper-colored DMC cross-stitching floss, and more Martha glitter.
For this pendant, I used a silver-toned bezel, and added a green quilled paper butterfly, and shiny blue Martha glitter. I finished it with a matching green satin cord, so it is ready to wear.
I made lots more, and may post them later. It is a fun, and easy, project, and I will gradually be listing them on Etsy.
And now, back to work on my Bead Soup Blog Party Creation. That necklace won't make itself, you know!! Time is running out! Eeeek!
These are a few pieces I have created:
In this piece, I used a bottlecap for the bezel, and painted it blue with my beloved alcohol inks. I lined the bottlecap with some funky scrapbooking paper, then decided to go a little meta, a little upcycle-y, and put a pop-tab in the bottlecap bezel. I added some scrapbooking flowers, and I threw in a gear. Going for little steampunk, too, I guess. Poured in the resin, and 3 days later, I finished it with a copper jumpring that I also painted blue with alcohol ink. I really like how this pendant turned out!
This one has a bronze-colored simulated wood-grain bezel, and I filled it with gears, paper flowers, and Martha Stewart glitter!! Ooh-la-la! And then poured in the resin, and voila!
For this pendant I used the same bronzy wood-grained bezel, and added several gears, on top of some shiny copper-colored DMC cross-stitching floss, and more Martha glitter.
For this pendant, I used a silver-toned bezel, and added a green quilled paper butterfly, and shiny blue Martha glitter. I finished it with a matching green satin cord, so it is ready to wear.
I made lots more, and may post them later. It is a fun, and easy, project, and I will gradually be listing them on Etsy.
And now, back to work on my Bead Soup Blog Party Creation. That necklace won't make itself, you know!! Time is running out! Eeeek!
Thursday, August 25, 2011
New Tie-Dyed Copper Cuff
There is a brand spanking, shiny, new copper cuff in my Etsy shop this morning.
It started as sheet copper.
I cut a narrow strip, and deeply acid-etched it to achieve the texture, and then colored it with alcohol inks. Then I gently sanded the surface of the strip to take all the color off my texture ridges, so that my lovely etched texture, and the beautiful copper, showed.
This picture shows the strip before I shellacked it to achieve the permanent, colorfast, shiny finish shown in the picture above. See my beautiful texture?
Alcohol inks are wondrous (yep, alcohol inks from the scrapbooking section!) While their color selection is quite narrow, there are so many different ways they can be used to color metal!
I loved the look of this "tie-dyed" strip of metal, and just wanted it to be shiny. Is that asking so much?? I already knew from previous experimenting with the alcohol inks that if I used embossing powder to seal the finish and give it shine, all the colors would bleed together, and I would end up with the hippie version of my "Spinach Omelet" pendant:
Alcohol inks LOVE to bleed, and blend, and comingle.
And that was not what I wanted. I pondered for several days before figuring out how to achieve my shiny, colorfast finish while preventing color bleed. The method I finally hit on still allowed a small amount of bleeding where the color blocks meet, and unfortunately it was just enough to partially obscure the beautiful texturing I worked so hard to achieve, but if you look closely, the texture is still there.
So anyway, I cut and prepped a much wider piece of copper, and deeply etched it again with the same texture as the color strip, attached the color strip to the cuff with decorative grommets, shaped the cuff, and then folded the corners up to provide a more comfortable fit. No rough edges!!
I tumbled it for hours and hours to achieve this brilliant polished shine, and here are lots more pictures of the cuff:
It is 2 inches wide, and approximately a size 7. It is malleable enough to be shaped to conform to your individual wrist comfortably, and can be shaped down to a size 6, or up to a 7.5 (not repeatedly, mind you - but if you aren't a size 7, it can be adjusted by its new owner for perfect fit!)
And while I was waiting for the acid to etch, and the inks to dry, I made a lovely, whimsical pair of unicorn earrings for the Regretsy fans out there.
I haven't listed these in my Etsy shop, but will, upon serious inquiry. I have pics from multiple angles available!
It started as sheet copper.
I cut a narrow strip, and deeply acid-etched it to achieve the texture, and then colored it with alcohol inks. Then I gently sanded the surface of the strip to take all the color off my texture ridges, so that my lovely etched texture, and the beautiful copper, showed.
This picture shows the strip before I shellacked it to achieve the permanent, colorfast, shiny finish shown in the picture above. See my beautiful texture?
Alcohol inks are wondrous (yep, alcohol inks from the scrapbooking section!) While their color selection is quite narrow, there are so many different ways they can be used to color metal!
I loved the look of this "tie-dyed" strip of metal, and just wanted it to be shiny. Is that asking so much?? I already knew from previous experimenting with the alcohol inks that if I used embossing powder to seal the finish and give it shine, all the colors would bleed together, and I would end up with the hippie version of my "Spinach Omelet" pendant:
Alcohol inks LOVE to bleed, and blend, and comingle.
And that was not what I wanted. I pondered for several days before figuring out how to achieve my shiny, colorfast finish while preventing color bleed. The method I finally hit on still allowed a small amount of bleeding where the color blocks meet, and unfortunately it was just enough to partially obscure the beautiful texturing I worked so hard to achieve, but if you look closely, the texture is still there.
So anyway, I cut and prepped a much wider piece of copper, and deeply etched it again with the same texture as the color strip, attached the color strip to the cuff with decorative grommets, shaped the cuff, and then folded the corners up to provide a more comfortable fit. No rough edges!!
I tumbled it for hours and hours to achieve this brilliant polished shine, and here are lots more pictures of the cuff:
It is 2 inches wide, and approximately a size 7. It is malleable enough to be shaped to conform to your individual wrist comfortably, and can be shaped down to a size 6, or up to a 7.5 (not repeatedly, mind you - but if you aren't a size 7, it can be adjusted by its new owner for perfect fit!)
And while I was waiting for the acid to etch, and the inks to dry, I made a lovely, whimsical pair of unicorn earrings for the Regretsy fans out there.
I haven't listed these in my Etsy shop, but will, upon serious inquiry. I have pics from multiple angles available!
Wednesday, August 24, 2011
BSBP Beads are Here! The challenge begins!
My Bead Soup Blog Party beads are here!
My partner is Tammy Jones, of Interweave's Jewelry Making Daily. JMD is on Facebook, too!
This mix includes a large carnelian ring, assorted turquoise nuggets, bamboo coral nuggets, and sponge coral nuggets, a long strand of small turquoise barrel beads in a delicious greenish shade, some beautiful faceted aventurine rounds, and a silver toggle. I am overwhelmed by how many beads Tammy was able to fit in that box!
Now I have to figure out where to go with them!
My partner is Tammy Jones, of Interweave's Jewelry Making Daily. JMD is on Facebook, too!
This mix includes a large carnelian ring, assorted turquoise nuggets, bamboo coral nuggets, and sponge coral nuggets, a long strand of small turquoise barrel beads in a delicious greenish shade, some beautiful faceted aventurine rounds, and a silver toggle. I am overwhelmed by how many beads Tammy was able to fit in that box!
Now I have to figure out where to go with them!
Sunday, August 21, 2011
Waiting with Bated Breath
Anxiously awaiting the arrival of my bead soup party beads from my partner, Tammy Jones, of Interweave's Jewelry Making Daily. Can't wait to get started creating!
I check the mail box several times a day!!
Sunday, August 14, 2011
Flight of the Dragonfly
I switched things up a little; I actually started AND finished a jewelry design without letting myself get distracted by other projects.
This is "Flight of the Dragonfly."
Its working title was "Kitchen Sink", because I started off by laying out on my workbench all the various components I wanted to incorporate: beautiful etched lampwork beads, some green fire agate, the porcelain dragonfly component, brown freshwater pearls, Czech glass accents, some bronze metal disc beads, Swarovski crystals, and lots of Vintaj Natural Brass components, including chain, wire, leaves, dragonflies (or butterflies - I can't tell), bead caps, and rings. Everything but the kitchen sink, it seemed!
By the time I had gathered everything and carefully laid it out, I couldn't see my work surface anymore, and had to shove everything a lot closer together in order to have about 8 square inches to work!
There is so much going on in this necklace, and I just love how it turned out!
2 very different elements converged to inspire this piece.
One was this beautiful porcelain Dragonfly focal connector. I had bought it several weeks ago, and it was actually for sale in the shop (my B&M bead shop), but I guess it was burned into my subconscious.
I told you a couple of weeks ago about my foray into alcohol inks.
I have played around with a lot of colors, and designs, and different spins on the technique, and we actually dedicated an entire studio day to seeing how many different ways we could use alcohol inks, embossing powder, and paints on various metals.
Shortly after that studio day, I walked past the display where the dragonfly focal was, and picked it up, and started grabbing various leaf and dragonfly Vintaj pieces, and began playing with the techniques to color my metal components. I didn't want them all to look the same, so there are actually 4 different coloration techniques demonstrated here.
And it never occurred to me that it would take a mighty big necklace to work all these components together!
I just started walking around the shop with the porcelain dragonfly and my colored metal components, and began grabbing things here and there that went together, and soon I had an awful lot of stuff to put together!

It didn't take long for me to realize that I needed a matching jumprings, in several different sizes, in order to make this all work, so I wound coils of Vintaj Natural Brass wire, in 5 different sizes, and 2 different gauges, and then cut and tumbled them.
This picture shows what I called "phase I." It has the porcelain dragonfly focal, one of the lampwork beads, and a few of the colored Vintaj components. There is a Vintaj ring (to the left of the focal in this pic) that I embellished with a picot stitch. Everything is connected with chain, jumprings, and some artful wire-wrapping that serves both as a structural component and a design element.
The porcelain dragonfly focal bead had 3 holes, and I love the chain tassel I created (with the little dragonfly flitting by!)
It was at this point that I realized this was going to be more than a one strand necklace. I had only used a few of the specially-colored Vintaj elements that I specifically created for this piece. And only one of the lampwork beads! And none of the unusual green fire agate. And by gosh, I was going to use everything I had picked out!!
After all, my motto is More is More! I am the queen of embellishing!
And all this time realizing that my components and wire-wrapping couldn't extend up around my neck, or I wouldn't be able to wear my own design.
Here is "Phase II."
I have added another of the lampwork beads, and another of my green Vintaj leaves. And in order to balance the second strand, I worked in some more of my luscious bronze metal discs, and needed a 3rd focal element for the other side of the second strand, so I got up and searched for yet another element to add to this necklace! I found an abalone donut with the perfect colors, so I borrowed a page from Denise Peck's brand new book on Wire Findings, and used Vintaj Wire to wrap the abalone donut and incorporated it into the second strand.
I still had components I wanted to add, and I wanted to soften all the wire and metal elements, and in my mind I saw a 3rd strand, softly nestled between the 2 strands here, consisting of off-white freshwater pearls, small teal seed beads, and delicate Vintaj Natural Brass chain, all twisted together.
And I couldn't do any more embellishing to the top strand until I had that middle strand in place.
This might have been the point where I realized I had lost my mind, or should have stepped back for a reality check. Danger, Will Robinson!!
I strung the seed beads, one at a time.
I strung the off-white button pearls, one at a time.
I sat there, twisting them with the Vintaj chain, trying to figure out how to attach this torsade element without using another bulky component (e.g. a cone), but none of the beadcaps I had were large enough to cover the crimps. So I ultimately ran the pin holding the crimped seed beads, pearls, and the chain up through a cone, and attached it to one side of the necklace. And the 3 strands hung there on the bust (the seed bead strand and the pearl strand clamped of with Bead Stoppers) while I tried to figure out how to calculate the correct length, twisted, to get this strand into position. I didn't want to be stringing and restringing, crimping and recrimping, and repeatedly re-wrapping the headpin on the other side. I just wanted to do this once!
And then it sat there on my workbench for 2 full days while I played with it, held it up, tried it on, and procrastinated. I was so determined to attach this middle strand just once. (LOL)
I knew I just needed to go for it - make my best calculated guess at the length, and if it was wrong, it was wrong. I pulled the crimps through the wrapped loop on the other headpin, and hung the chain on the pin; ran the headpin through the cone; tried it on while holding the headpin/cone in position, and it looked great.
So I crimped everything, wrapped the loop, and tried it on, crossing my fingers. Because I really didn't want to do this part over.
Too bad I forgot to calculate for the length of my wrapped loop where the 2nd cone attached to the necklace. Because sure enough, the twisted 3rd strand was exactly 2mm too long. Just the length of my wrapped loop! The middle strand just didn't hang exactly in the middle between strands one and three. While it wasn't touching the 3rd strand, it was hanging just low enough to bug me. And if Momma ain't happy, she won't be wearing the necklace.
I pouted for about 15 minutes, and then cut the offending wrapped loop.
I tried to salvage my stringing efforts by carefully cutting the crimps, hoping to avoid having to restring the pearls and seed beads. HA! I spent an hour trying to avoid the restring, and ultimately couldn't get the crimps off. I actually shredded the beading wire trying to remove the crimps. So I started all over, and got it right the 2nd time. Yay!
I began embellishing again, hanging dangles here and there. I managed to include all my desired elements and while it looks a little crowded on the bust, remember that it hangs differently on any real person, as the bust's neck measures only about 12 inches. So when worn, the 3 strands and all the various elements spread out nicely and evenly.
This is "Flight of the Dragonfly."
Its working title was "Kitchen Sink", because I started off by laying out on my workbench all the various components I wanted to incorporate: beautiful etched lampwork beads, some green fire agate, the porcelain dragonfly component, brown freshwater pearls, Czech glass accents, some bronze metal disc beads, Swarovski crystals, and lots of Vintaj Natural Brass components, including chain, wire, leaves, dragonflies (or butterflies - I can't tell), bead caps, and rings. Everything but the kitchen sink, it seemed!
By the time I had gathered everything and carefully laid it out, I couldn't see my work surface anymore, and had to shove everything a lot closer together in order to have about 8 square inches to work!
There is so much going on in this necklace, and I just love how it turned out!
2 very different elements converged to inspire this piece.
One was this beautiful porcelain Dragonfly focal connector. I had bought it several weeks ago, and it was actually for sale in the shop (my B&M bead shop), but I guess it was burned into my subconscious.
I have played around with a lot of colors, and designs, and different spins on the technique, and we actually dedicated an entire studio day to seeing how many different ways we could use alcohol inks, embossing powder, and paints on various metals.
Shortly after that studio day, I walked past the display where the dragonfly focal was, and picked it up, and started grabbing various leaf and dragonfly Vintaj pieces, and began playing with the techniques to color my metal components. I didn't want them all to look the same, so there are actually 4 different coloration techniques demonstrated here.
And it never occurred to me that it would take a mighty big necklace to work all these components together!
I just started walking around the shop with the porcelain dragonfly and my colored metal components, and began grabbing things here and there that went together, and soon I had an awful lot of stuff to put together!

It didn't take long for me to realize that I needed a matching jumprings, in several different sizes, in order to make this all work, so I wound coils of Vintaj Natural Brass wire, in 5 different sizes, and 2 different gauges, and then cut and tumbled them.
This picture shows what I called "phase I." It has the porcelain dragonfly focal, one of the lampwork beads, and a few of the colored Vintaj components. There is a Vintaj ring (to the left of the focal in this pic) that I embellished with a picot stitch. Everything is connected with chain, jumprings, and some artful wire-wrapping that serves both as a structural component and a design element.
The porcelain dragonfly focal bead had 3 holes, and I love the chain tassel I created (with the little dragonfly flitting by!)
After all, my motto is More is More! I am the queen of embellishing!
And all this time realizing that my components and wire-wrapping couldn't extend up around my neck, or I wouldn't be able to wear my own design.
Here is "Phase II."
I have added another of the lampwork beads, and another of my green Vintaj leaves. And in order to balance the second strand, I worked in some more of my luscious bronze metal discs, and needed a 3rd focal element for the other side of the second strand, so I got up and searched for yet another element to add to this necklace! I found an abalone donut with the perfect colors, so I borrowed a page from Denise Peck's brand new book on Wire Findings, and used Vintaj Wire to wrap the abalone donut and incorporated it into the second strand.
I still had components I wanted to add, and I wanted to soften all the wire and metal elements, and in my mind I saw a 3rd strand, softly nestled between the 2 strands here, consisting of off-white freshwater pearls, small teal seed beads, and delicate Vintaj Natural Brass chain, all twisted together.
And I couldn't do any more embellishing to the top strand until I had that middle strand in place.
This might have been the point where I realized I had lost my mind, or should have stepped back for a reality check. Danger, Will Robinson!!
I strung the seed beads, one at a time.
I strung the off-white button pearls, one at a time.
I sat there, twisting them with the Vintaj chain, trying to figure out how to attach this torsade element without using another bulky component (e.g. a cone), but none of the beadcaps I had were large enough to cover the crimps. So I ultimately ran the pin holding the crimped seed beads, pearls, and the chain up through a cone, and attached it to one side of the necklace. And the 3 strands hung there on the bust (the seed bead strand and the pearl strand clamped of with Bead Stoppers) while I tried to figure out how to calculate the correct length, twisted, to get this strand into position. I didn't want to be stringing and restringing, crimping and recrimping, and repeatedly re-wrapping the headpin on the other side. I just wanted to do this once!
And then it sat there on my workbench for 2 full days while I played with it, held it up, tried it on, and procrastinated. I was so determined to attach this middle strand just once. (LOL)
I knew I just needed to go for it - make my best calculated guess at the length, and if it was wrong, it was wrong. I pulled the crimps through the wrapped loop on the other headpin, and hung the chain on the pin; ran the headpin through the cone; tried it on while holding the headpin/cone in position, and it looked great.
So I crimped everything, wrapped the loop, and tried it on, crossing my fingers. Because I really didn't want to do this part over.
Too bad I forgot to calculate for the length of my wrapped loop where the 2nd cone attached to the necklace. Because sure enough, the twisted 3rd strand was exactly 2mm too long. Just the length of my wrapped loop! The middle strand just didn't hang exactly in the middle between strands one and three. While it wasn't touching the 3rd strand, it was hanging just low enough to bug me. And if Momma ain't happy, she won't be wearing the necklace.
I pouted for about 15 minutes, and then cut the offending wrapped loop.
I tried to salvage my stringing efforts by carefully cutting the crimps, hoping to avoid having to restring the pearls and seed beads. HA! I spent an hour trying to avoid the restring, and ultimately couldn't get the crimps off. I actually shredded the beading wire trying to remove the crimps. So I started all over, and got it right the 2nd time. Yay!
I began embellishing again, hanging dangles here and there. I managed to include all my desired elements and while it looks a little crowded on the bust, remember that it hangs differently on any real person, as the bust's neck measures only about 12 inches. So when worn, the 3 strands and all the various elements spread out nicely and evenly.
Ta Da!
Labels:
abalone,
alcohol ink,
bronze,
Denise Peck,
donut,
dragonfly,
green,
Handcrafted Wire Findings,
leaf,
metal,
multistrand,
necklace,
Sweet Freedom Designs,
teal,
Vintaj Natural Brass,
wire wrapping
Subscribe to:
Posts (Atom)