Showing posts with label toggle. Show all posts

Tuesday, July 17, 2012

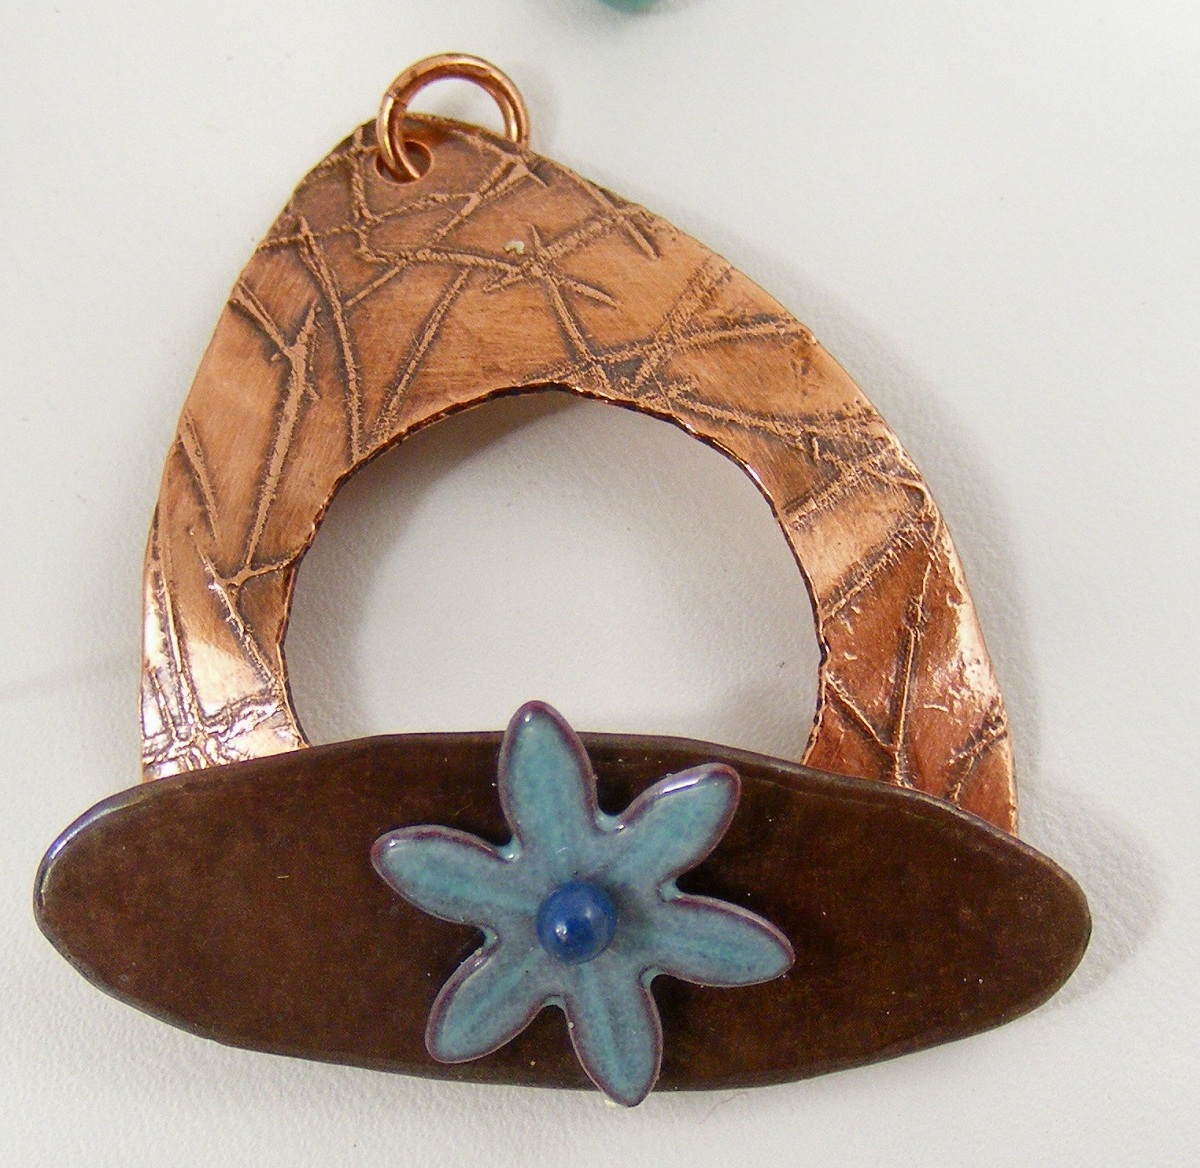
Enameled Bar for Copper Toggle

Reminder: This is the copper toggle I sent my BSBP partner, Kate.

Yesterday, I ran down the steps that went into the creation of the toggle ring.

To make the bar for the toggle I used some of the same steps, so I'll just be listing these, rather than describing them again - please refer to yesterday's tutorial if you need more detailed info!

1) Create a paper template for the toggle bar. I draw what I have in mind on some scrap paper, cut it out, and then see if it works the way I want it to - Right size, shape, etc. My paper templates have saved me from wasting a lot of metal!

2) Draw the desired bar shape on 24g sheet copper (with a fine-tipped Sharpie). Cut the shape out with metal shears or a jeweler's saw.

3) Punch or drill a hole where you want to attach the ring. I chose the center for this bar. 

4) File/sand all the rough edges

5)  Tumble the bar to harden and polish it (the polishing won't be visible after enameling, but the surfaces will be much more smooth than you could achieve by filing and sanding! Tumbling is your friend!

6) I knew I wanted to enamel the bar in the same brown as the enameled beads I sent Kate, but I decided to add a little blue embellishment in the form of a copper flower. I set up my enamel immersion torch-firing station, used brown enamel for the bar, then enameled the flower. Then I drew a bead on a piece of 20g copper wire, and enameled the resulting head pin in a darker shade of blue.

7) Assemble the bar - I put the headpin through the flower and the bar, and made a wrapped loop on the back.

I'd love some opinions on this toggle ring and bar combo - I wanted to make the toggle match the beads I sent Kate, but I wanted the gorgeous details and texture from the etching process to show, so I decided to leave the ring etched, and enamel the bar to achieve the matching colors. So the bar and ring don't really match each other, but I often will make a beadwoven toggle bar and use it with a Swarovski crystal, or use unusual found objects as toggle bars, so my toggle components frequently don't match each other. As long as they complement the overall design, that's what it's all about for me!

How do you feel about the components not matching? What kind of "unmatchy" clasp components have you used?

Monday, July 16, 2012

Copper Toggle

This is the copper toggle clasp I sent Kate for our BSBP swap:


I'm going to describe how I made the toggle ring today, and come back tomorrow to talk about the toggle bar.

Step 1 - decide on a rough shape, and draw it on 24g sheet copper:

(I used a circle template to draw the inner ring.)
Step 2: Cut the piece out. I used metal shears to cut along the outer markings, and then used a jeweler's saw to pierce (saw) the inner circle:

This is the piece, resting on my bench pin, which is clamped to my workbench. Don't forget to lubricate the saw blade!

After cutting it out, smooth any rough edges with a metal file or coarse emery board. This is also a good time to punch your hole for the attachment jump ring, and file off any resulting roughness.

3)  Choose a design for etching into the metal. I have 50 or 60 to pick from, and this choice is always hard for me - I love them all! Once the design stamp is chosen, I stamp it directly on the metal, using Staz-On ink:


The stamp I used is at the top right, and you can see the result on the toggle ring below it. I use my bench block as a stamping surface because it is hard, and it is flat and even. Any irregularities or "give" in the surface you are stamping on can sabotage the stamping effort, as the metal will bend away from you, resulting in an uneven stamping, or a smeared one. But the ink can be cleaned off with acetone, and you can restamp, over and over (not that I ever have to do this, LOL).

Let the ink dry. I'm never sure how long this really takes, and I try to plan for a 24 hour wait period here. But sometimes that plan fails, and I have etched as soon as 30 minutes later (when the ink is actually still smearable, so I know it isn't dry) and I have still achieved good results.

If your metal piece got bent in the cutting process, you'll need to flatten it before stamping - do this by placing it on the bench block and smacking it with another bench block (cover your ears first!) OR by placing it on the bench block, covering it with something spongy like a piece of foam rubber, and then smacking it with a rawhide mallet.

4)  Etch! Place a piece of packing tape on the back of the piece you are etching. Place the piece face UP in a container of ferric chloride, just deep enough to cover the stamped surface. Adhere the free ends of the packing tape to the top edges of the acid container, so you'll be able to remove the piece from the acid without putting your fingers in it.  Let it sit for 90 minutes.


The murky dark cloud in the center of the piece is the acid reacting with my copper toggle. You can just make out the packing tape curled up and stuck to the sides of the bowl.


5) Neutralize: Use the packing tape to lift the piece out of the acid and dunk it straight into a solution of baking soda and water. It will bubble - a few seconds is all you need. Then carefully remove the copper from the tape, and wash in soap and water. This whole step needs to be done with care - you don't want the acid on you, your clothes, or anything you care about, because 1) it's acid, and 2) it's a nasty permanent orange color. Even after it's neutralized, that orange color sticks around and will stain everything.

etched toggle, before Liver of Sulfur

6)  Use Liver of Sulfur to oxidize the ring, to give a little contrast in the etched recesses. This is completely optional, but gives the piece nice depth.

7) Dome the copper toggle ring if desired.

8)  Add a jumpring. Tumble the piece to harden it and bring out a gorgeous shine.


Tada!