Thursday, August 29, 2013

Beaded Bead Necklace and Earrings

I stitched up some beaded beads (in 2 different sizes) using champagne freshwater pearls, denim blue Swarovski crystals, blue and bronze seed beads, and Picasso blue Czech glass:

blue and bronze beaded bead necklace and earrings

I like the way they look with Vintaj Natural Brass, so I used that for the chain and earwires.

This particular beaded bead is fully reversible: it looks identical on each side. I am still having a little issue with the term "beaded bead", though, as this is the second beaded bead I've worked with that doesn't have holes for stringing. For this one, I stitched seed bead loops for hanging.

blue and bronze beaded bead earrings


blue and bronze beaded bead pendant, on Vintaj Natural brass

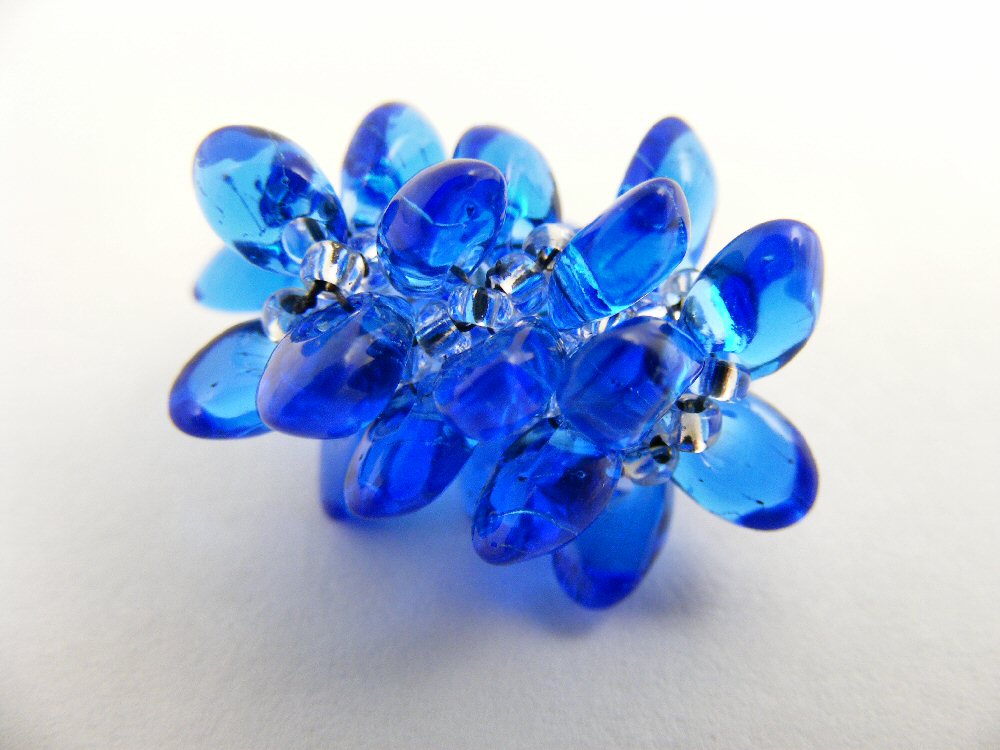
And look: I figured out how to get one of those artsy, out of focus jewelry porn shots that are so prevalent on Etsy:

out of focus jewelry porn


The earrings and necklace are available separately in my Etsy shop.

Saturday, August 24, 2013

Beaded Beads with Long Magatamas

Long Magatamas are interesting little beads - they have a neat shape, and are often used to provide texture to patterns, but they flummox me a little. They are highly directional - if you don't pick each one up with the same orientation, your finished piece can look very "disheveled".

I used Magatamas to create a kumihimo necklace a few weeks ago, and have been looking for other ways to use them in my beadwork.

Yesterday, I started playing with some Magatamas, and found I could use netting to create beaded beads with them:


 Beaded Bead with Long Magatamas and 11/0s (netting)

It may not look like much in this picture, but after I made a few more, and strung them into this bracelet, I really like the result:

Beaded beads made with Long Magatamas (netting)


I separated each Long Magatama beaded bead with 10mm Swarovski crystals, which are each bookended with square textured and domed bead caps.


This bracelet is now available in my Etsy shop!

Wednesday, August 14, 2013

All Peyoted Out

Yesterday I finally finished the peyote bracelet that has been bedeviling me for most of the summer:

Royal Ruffles

This is from Hannah Rosner's Royal Ruffles pattern, which I purchased on impulse back in May, because I wanted something new to do.

This peyote pattern is very similar to several I have purchased from Carol Dean Sharpe, like her Corrugated Ribbon Cuffs, in that all are even count peyote patterns that rely on changing bead shapes and sizes to give texture to the design.

The distinction with the Royal Ruffles is that the 11/0 triangles are positional - they must point one way for the "peaks" and another way for the "valleys" of the ruffles - and while I understood this thoroughly and completely, accomplishing it was another matter entirely - which resulted in this on my first attempt:


I don't know if you can really tell, but my ruffles aren't lining up correctly, because I didn't have the hang of how to make the triangles behave. I kept stitching, and decided (because this was days and days worth of stitching by this point) that I would just live with it. But then my OCD kicked in, and after I reached the point in the pic above, I ripped the whole thing apart, and declared that no 11/0 triangle would get the better of me!

Detail:

As soon as I started over, I instantly saw the answer to the triangle issue, and it was (almost) smooth sailing from then on. Except for 2 things: about halfway through, one of the triangles apparently cut the Fireline (even though I was working with it doubled, to prevent this), and the whole bracelet ripped apart along the row where the Fireline tore, just about 1.5 inches from the beginning, so I had to take apart the whole piece that had torn off, and basically start over again.

And then, just when I was almost done, I spotted a wayward triangle atop a peaking ruffle, about 3 ruffles back, and I just couldn't stand it, so I ripped out 3 ruffles (during which I had restarted my Fireline twice, so that was extra fun), and started forward progress. Again.

The ruffles make this bracelet want to rotate:

You may have to click on the pic to see, but when you pull on both ends of the bracelet, the ruffles open up while the bracelet rotates - as I was stitching (and stitching, and stitching!) this bracelet, I kept draping it on my wrist while expanded, and mulling over the idea of wearing it like this (like in the pic above). It sure would have saved me a lot of stitching! (including that last do-over, because I never would have had to kept stitching to the point of that mis-directed triangle!) - But, try as I might, and I tried many, many times, it just wasn't comfortable to wear this way, so I kept stitching. Can you see that the bracelet is already 11 inches long, and I haven't added the clasp loop?


Several times over the course of making this bracelet I just had to take a break from it - after several days, the repetition just got boring. Some customers had asked me to teach them odd-count peyote so they could make a bracelet in the August 2013 issue of Bead and Button, and since I had never done odd-count peyote, I decided to teach myself by making the same bracelet - and here it is:

Another view:
This was a fun bracelet to make, but again, lots and lots of stitching. Note to self: do NOT take a break from peyote to stitch more peyote.

Back to the ruffles:

Here is the almost finished bracelet, ruffles contracted, next to the ruler:


I love this button I found to match the bracelet:


And here are my 2 summer peyote projects side by side:


Whew!


I thought I would be bead-woven out, and could get back to some metalsmithing, but I still have the fever, and have already started something new!

Tuesday, August 6, 2013

Tangle Tuesday

I have been crazy busy, but took time this weekend to tangle:

Some of the tangles I used here include:
  • wavy
  • bunzo
  • bubbles
  • pawn bridge
  • unyun

Wednesday, July 31, 2013

I love my optivisor!

I saw a "poll"somewhere recently - I think on Etsy (a chit-chat, thinly-veiled promotional thread, really) - asking what your favorite jewelry tool is. I never respond to those threads, but it got me thinking about all the tools I love - many with vastly different functions, and how in the world could anyone pick just one?

And then I saw this picture, and it hit me: my optivisor. Of course.

Zachary Levi, rocking an optivisor

Years ago, I had been trying to create jewelry for several months, struggling to see what I was doing (especially when beadweaving), when I took a week-long class at William Holland Lapidary School, and was introduced to optivisors. It was like magic - I could actually see the eye of the needle, the seed beads, the holes in the seed beads, the flat side of half-round wire - truly a breakthrough for me, since I am legally blind.

Without my optivisor(s) AND my reading glasses, I would never have persisted with jewelry design. I simply wouldn't have been able to. I literally could not see what I was doing!

Once I purchased my first optivisor (I have 3), I was struggling to read the paper one morning, squinting, etc., despite the reading glasses I currently had, and decided to see what would happen if I tried to read the paper WITH the optivisor on (plus the reading glasses). Wow! Now I could actually see the words!

That discovery led to a long discussion with my ophthalmologist, who found the whole story incredulous. I mean, he knew about my eye issues, having diagnosed my weird, rare eye condition over 10 years ago. But he didn't know how severe it was, since my vision varies from the time I wake up 'til the time I go to bed, and he had never seen it at its worst. By the time I arrived at his office for my routine appointments, my vision had always improved from its morning worst. So after a 6-month-long odyssey of weirdly-timed appointments with him; where I had to do all sorts of unusual things* to demonstrate just exactly how bad my vision is; followed by a referral to the Emory Eye Clinic, where I actually had to spend 2 full days repeating all these weird diagnostic things (not a single NEW test was done); I found myself with a prescription for glasses, something like +5.75 diopters.Which I use, with my optivisor, for close work.

(Tangential question: why can't doctors just trust each other's word and test results, instead of repeating very expensive and time-consuming tests? Why should a referral to a specialist result in repetition of the very tests that led to that referral?)

So my optivisor is an absolutely essential tool for my jewelry design, and anything else requiring close work.

What's your favorite tool?


*Weird things I had to do to prove my vision was worse than my ophthalmologist thought:

  • schedule earliest morning appointment at his office
  • upon waking after at least 8 hours sleep (or, at least, 8 hours lying down with my eyes closed), have someone else (duh) drive me to the appointment, while I lie on the back seat of the car with my eyes closed (sorry doc, no shower/hair/makeup that morning!)
  • hustle into his office (eyes closed!) and lie down again, keeping those eyes closed
  • wait for him
  • full eye exam/refraction.
  • Then resume "normal" activity at his office, and have full eye exam/refraction every 30 minutes for the rest of the day. Fun!

And then I had to repeat all of this again, and more, at Emory. Sheesh - And here's a surprise - the guy in Atlanta got the same results!

Monday, July 29, 2013

Semiprecious Gemstone Lariat now available on Etsy

The semiprecious gemstone lariat I created for last year's BSBP is now available on Etsy:

Semiprecious gemstone kumihimo lariat with enameled beads


Detail, gemstone kumihimo

This one-of-a-kind lariat is 35.5 inches long, made from colorful amethyst, blue topaz, aquamarine, citrine, and peridot, plus my own enameled beads and cones, is available in my Etsy shop!

Saturday, July 27, 2013

Kumihimo variations

I am crazy about Kumihimo - I love its ease, its portability, and the finished result!

I have been experimenting with using different beads in kumihimo, and after a failed attempt to make size 8/0 Delicas into a kumihimo rope (the cylinidrical beads just wouldn't braid together niceley!) I realized that I have made a lot of different kumihimo variations. Here are some of them:

Kumihimo variations - different bead and fiber types

I like seeing them side-by-side like that, but here is a little better detail:

Kumihimo variations: 3-cut 6/0, 8/0 (3-color and 2-color), 11/0 triangles, Long Magatamas


 Kumihimo variations: Long Magatamas, 4x7 lentils, gemstone chips, various yarns

Do you have a favorite technique that you find yourself turning to time and again?